(Archived) Launch Free Oracle VMs Automatically
UPDATE 2022-01-30: This article is only kept here to remind me how stupid I was to ever wanted to try their product. You don’t want to use Oracle Cloud. Speaking from my experience, they are a pain to deal with when there is a problem. JUST. DON’T. USE. IT.
DISCLAIMER: THIS POST IS SOLELY FOR DEMO PURPOSES ONLY, AND IN NO WAY ENCOURAGING READERS TO ABUSE IT.
Preface
Oracle launched Always Free Eligible cloud services in 2019, but it’s a pain to create free VMs in some busy regions, like Tokyo or Seoul. This tutorial is going to teach you how to automate the retry process via cron job to get you 2 VMs.
Prerequisites
- Setting up an OCI (Oracle Cloud Infrastructure) account (Duh!)
Steps
1. Once Logged in, Click “Create a VM instance”

2. Try Create an Instance
If you need help on the SSH part, see Oracle’s Creating an SSH Key Pair on the Command Line.
I use CentOS 7 for OS image here.
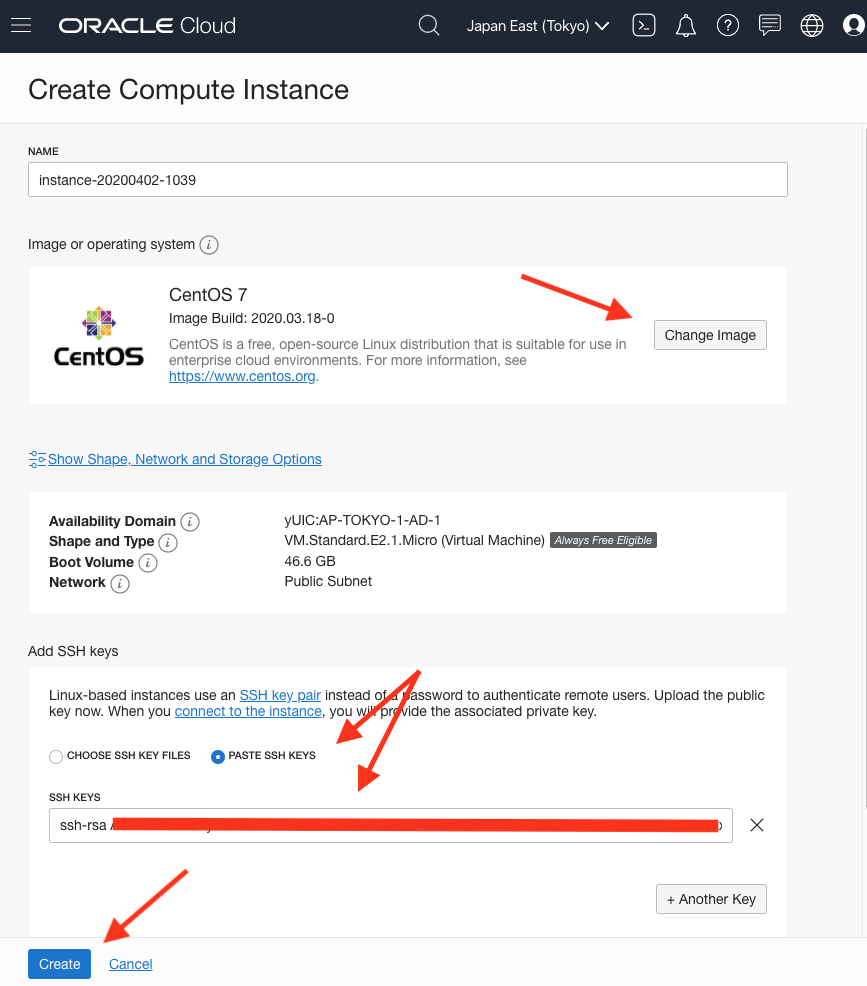
3. Passing or Failing
See step 4 if the creation fails by saying not enough host capacity in your region. Passed? Well…, if it passes it passes. You don’t need to read the rest then.
4-1. Gather Necessary Info for Creating an Instance
Back on “Create a VM instance” page, open browser’s developer tool (Mine is Chrome) and go to “Network” tab on “All”.
When all is set, re-do step 2, click “Create” button, quickly move to the developer tool to find the request with a 500 status, and click its name.
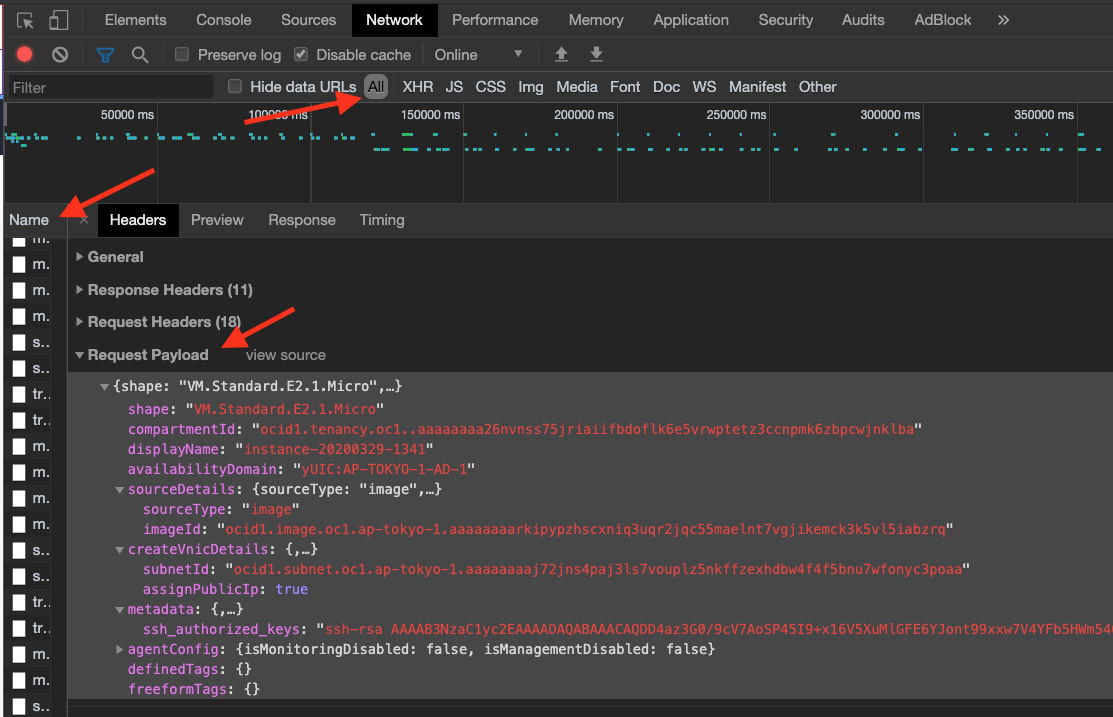
Click “view source” in “Request Payload”, and scrape values of the following keys out to your favorite text editor:
shape: "VM.Standard.E2.1.Micro"
availabilityDomain: "..."
compartmentId: "..."
subnetId: "..."
ssh_authorized_keys: "ssh-rsa ..."
imageId: "..."
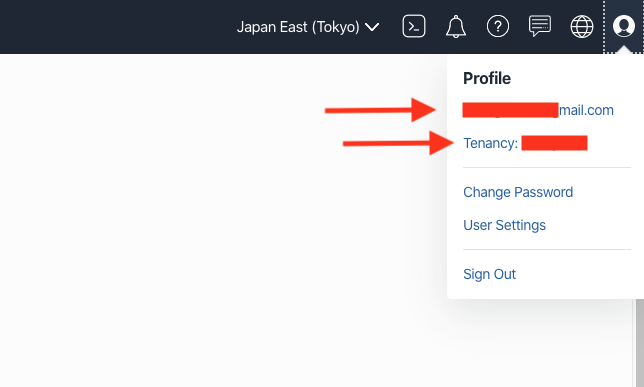
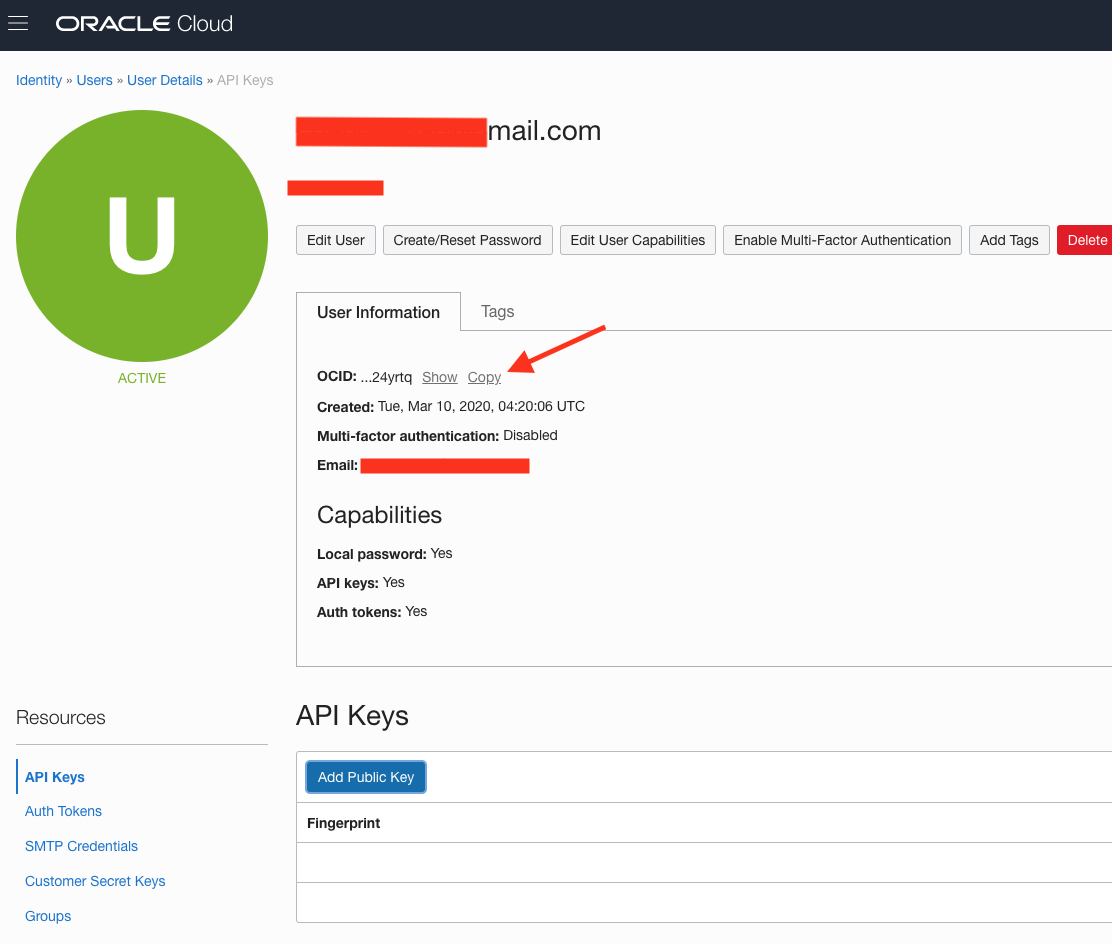
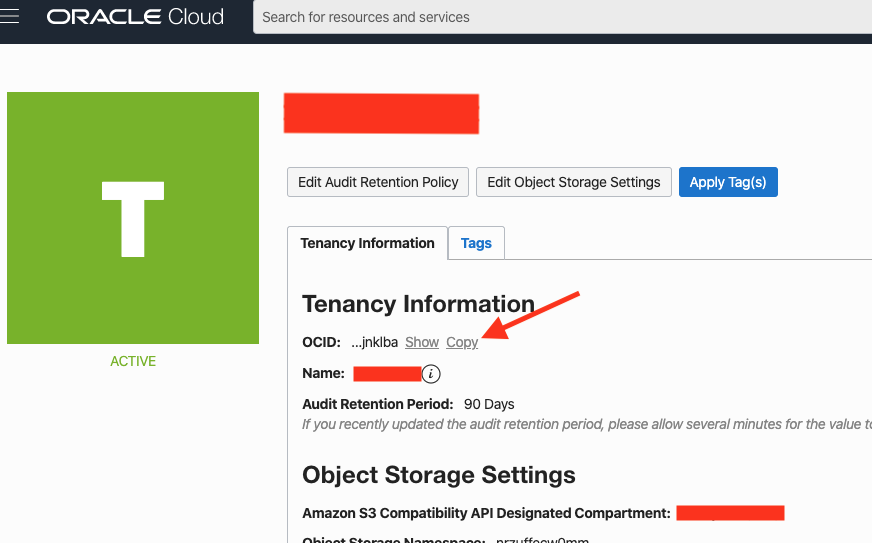
4-2. Gather Necessary User/Tenancy Info
Copy the values of “ocid” for user and tenancy:
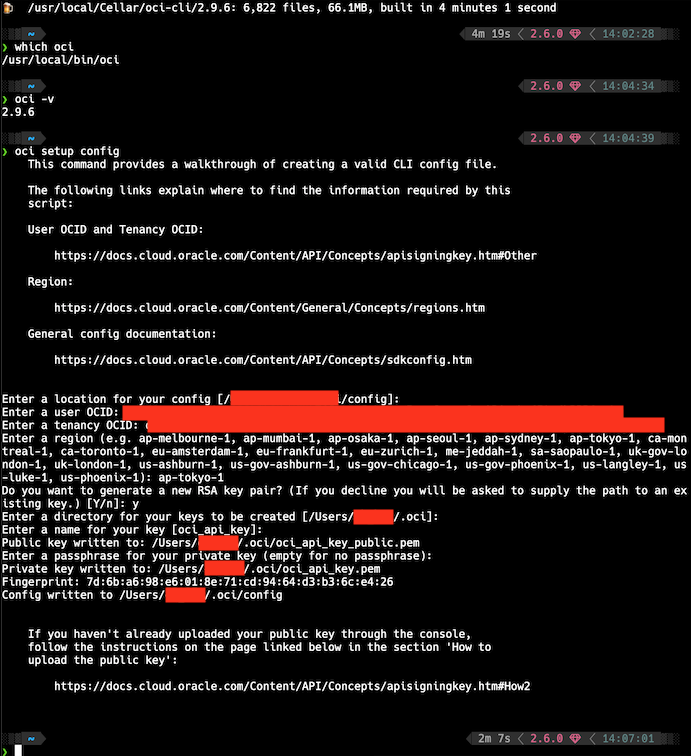
5-1. Set up CLI for OCI
Install official CLI.
There is a Homebrew formulae for this. Use it at your own discretion.
Once installed, run $ oci setup config and enter your user OCID, tenancy OCID, region, etc.
I hit “enter” to the rest of the options to use the default.
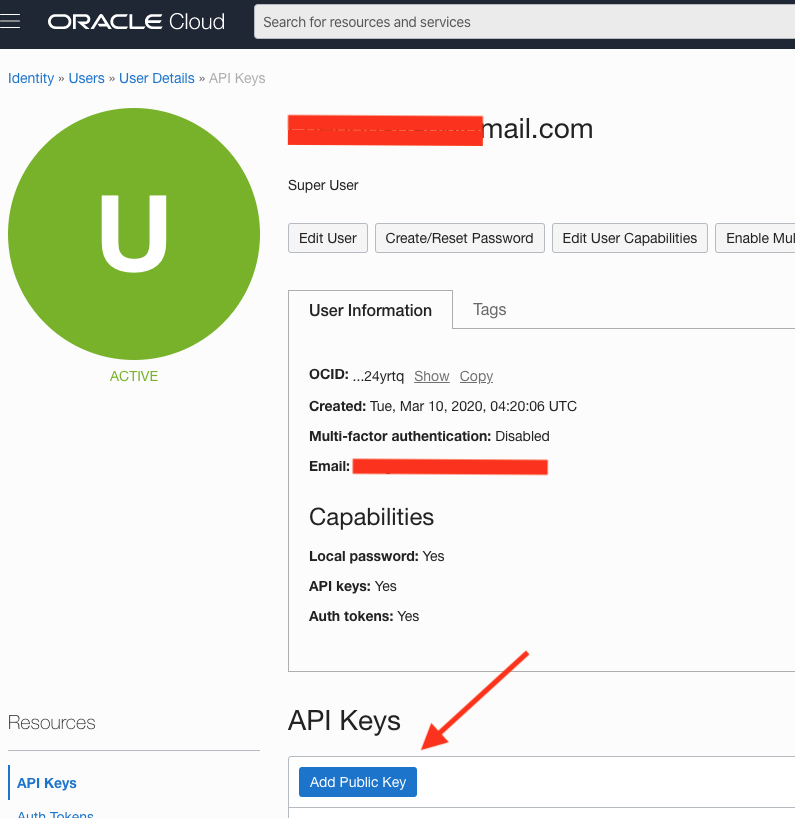
5-2. Connecting CLI to OCI
Find your oci_api_key_public.pem (path is in Find your public written to: in step 5-1), and add it to your profile through Add Public Key option:
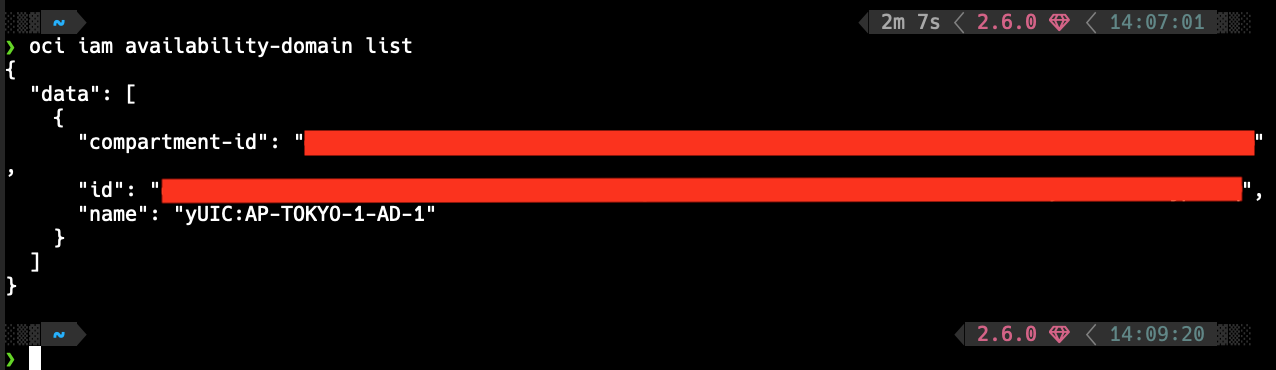
5-3. Verify
The setup is done when you see the below using $ oci iam availability-domain list:
6. Try Create Instances via CLI
Replace the _underscored_ part with the info gathered from step 4 and try execute it:
$ oci compute instance launch --availability-domain _availabilityDomain_ \
    --image-id _imageId_ \
    --subnet-id _subnetId_ \
    --shape VM.Standard.E2.1.Micro \
    --assign-public-ip true \
    --compartment-id _compartmentId_ \
    --metadata '{"ssh_authorized_keys": _ssh_authorized_keys_ }'
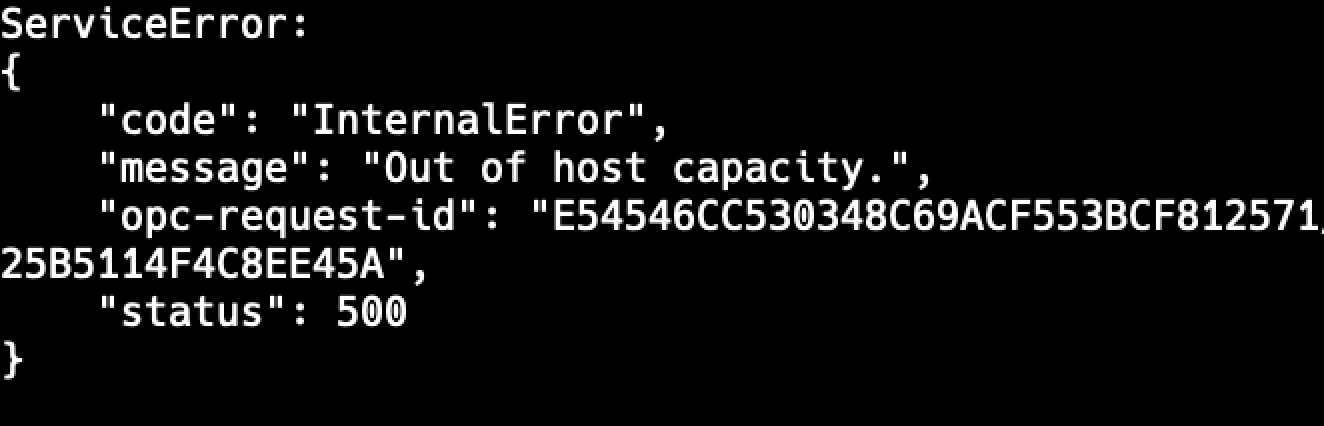
You should see the following error from the response if it works as expected:
7-1. Save the Command as Shell Script
Get the path of oci executable with $ which oci and replace oci in front of the command in step 6 with the path you got.
Mine is at
/usr/local/bin/oci
Then create a file as oci-auto-launch.sh, save it in your home directory (~/):
#!/bin/sh

/usr/local/bin/oci compute instance launch --availability-domain _availabilityDomain_ \
    --image-id _imageId_ \
    --subnet-id _subnetId_ \
    --shape VM.Standard.E2.1.Micro \
    --assign-public-ip true \
    --compartment-id _compartmentId_ \
    --metadata '{"ssh_authorized_keys": _ssh_authorized_keys_ }'
7-2. Execute the Script with Cron Job
Make the file excutable with $ chmod +x ~/oci-auto-launch.sh. Then run $ crontab -e and put the following in the file, save and exit:
I use
$ EDITOR=vim crontab -ehere.
* * * * * ~/oci-auto-launch.sh > ~/oci-auto-launch.log 2>&1
The five
*means to execute the script once per minute.
8. Check the Status of the Launch
You may use $ tail -F oci-auto-launch.log to see what’s going on at the moment. You know you get 2 instances when you see code LimitExceeded with a status of 400 from the response. :)
9. Stop the Cron Job
Once you are done, run $ crontab -e, remove the job, save and exit.
After Getting Two VMs
SSH to Your Instances
See Oracle’s Connecting to Your Instance.
The below is how I alias the command to $ ssh oci1:
# ~/.ssh/config
Host oci1
  HostName (put your VM's public address)
  User your_user_name
Some Basic Setup
See 部署你的第一個 Ruby on Rails 網站(一).